25 February 2008

AVF #2: A Vegetarian Feast-in-a-Pot Roundup

Well, again it was a small event, with only two soups this time, but that's all right. I'll keep coming up with a theme every few months in hopes that more of you will get interested!

I'd like to thank Lisa of Lisa's Kitchen for submitting her tasty-looking Curried White Bean and Red Lentil Stew to this round! A great hearty winter meal, and I love basmati rice and saffron. I'll have to try this one out soon!

If you didn't catch it the first time around, I made a Winter Friendship Soup, recipe courtesy of my good friend Cass, for both this event and Lisa and Holler's "No Croutons Required." Not only is it very yum, but it kept me eating for a week and is very filling (and healthy, too!)

Stay warm the rest of this winter, and stay tuned for the next Vegetarian Feast in April!

24 February 2008

Blog Partaaay

Time for another Blog Party! This month's theme was fried food, and I went a little overboard. See, by the time I had already bought the ingredients for zucchini patties, I decided to flip through the February issue of Gourmet and found a fantastic-looking recipe for quinoa cakes with eggplant ragu in the Vegetarian Tonight section. Lo and behold, I had just been making happy noises at New Pi when I was buying my zucchini because they had quinoa, so I had to try it. Unfortunately, this trip revealed very shrunken looking nasty little brown eggplants. I was bummed, because I adore eggplant, but I decided I could substitute zucchini instead and get away with it.

Zucchini Patties

I have no idea where I got this recipe, but it's delicious. When I was living at home, I used to love these frozen spinach potato pancakes Mom would bring home sometimes. I've always like latkes, but these were great, because you had a little green with your potato as well. Still, they were definitely not homemade. This recipe has the benefit of tasting delicious and fresh, and rather than potato, there's cheese and flour, which makes for a fluffier cake. I approve!

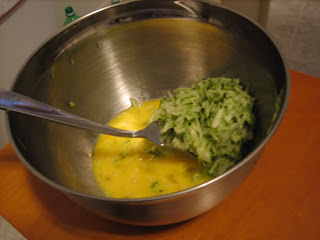
I've always liked recipes that are easy enough to memorize, and this is one of those. Also, it uses a lot of ingredients I have around anyway. I started by beating my two eggs with a fork in a big bowl, and then grated in two cups of zucchini on top of that. Zucchini is soft enough that it's really easy to do with a cheese grater, which is nice if you don't want to mess with a food processor and special blades and things.

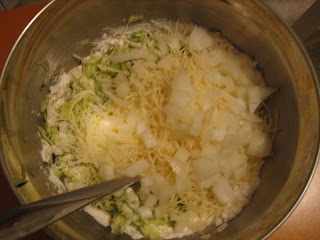
The rest of the ingredients are half a cup each shredded mozzarella and parmesan, half a cup of flour, a quarter cup chopped onion (I always do onion last to avoid tears), and salt to taste. I made myself put a few shakes of salt in, because I never use much salt in a recipe but it really is good to have a little for something mild like this. Give it a nice thorough mix to evenly incorporate the ingredients, especially to evenly distribute the egg.

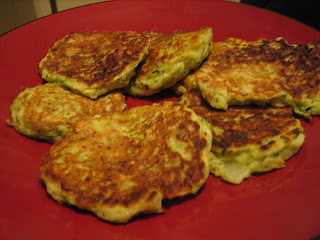
To fry, heat up just a little oil in a skillet over medium high heat. I go with medium, because my burners tend to run hot. I used canola oil, but I think anything would be fine. You then want to cook heaping tablespoonfuls, a few minutes on each side or until golden brown. If you use just a little oil, there's no need to pat with paper towels. Also, I recommend patting the patties down in the pan so that they're thin enough to cook through (about 1/2 an inch). They may brown up quickly, and of course you can reduce the heat.

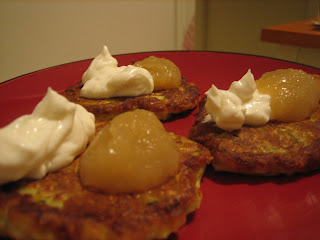
The recipe says serve with sour cream, but even though they aren't technically latkes, I can't have any sort of vegetable pancake-like-thing without sour cream and apple sauce. They're absolutely fabulous warm, and make a good breakfast as well as an afternoon or evening meal.


Quinoa Cakes with Zucchini Ragu

I had to do a lot of thinking about this recipe to figure out how to get the timing right, but I think I did pretty well. First, though the recipe calls for bottled red peppers, I really couldn't understand why I would want to pay extra money and go to the effort of draining the darn things for a less delicious taste. Roasting red peppers is so easy, so I just bought one and did it in my new toaster oven, which was a birthday gift from the parentals. I normally roast them whole, but I tried a different method this time, halving the pepper first and scraping out all the seeds and membranes in advance. I put it cut side down and broiled about ten minutes, until blackened and blistering.

Keep in mind when you're roasting peppers (I always forget this), that you want a substantial number of black spots. Otherwise, parts will be easy to peel and other parts will be difficult. Anyway, if you get it fairly blackened and then stick the pepper in a closed paper bag for half an hour, the skin should come right off.

Next step is to deal with the quinoa itself. The recipe says to wash it in three changes of water. I admit, I didn't. Seemed like a lot of trouble. You want to use a cup and a half water for a cup of quinoa, and add 1/2 t to the water before bringing it to the boil. Add the quinoa, bring back to the boil, then cover and lower to a simmer. It's supposed to take 20-30 minutes, and for me it was more like 16 (again, hot burners). The goal is that all of the water is absorbed, and you don't have to stir. Take it off the heat and leave the lid on for five minutes, then transfer to a bowl and cool 10 minutes, stirring occasionally. Add a beaten egg and stir.

To form your quinoa cakes, start by lining a baking sheet with plastic wrap and brush lightly with olive oil. Oil a one cup dry measure and pack in the quinoa 2/3 full, then turn over onto the baking sheet. It'll crack a bit, just press it flatter with your hands or a spatula. The recipe says 4-inch cakes, but I suck at eyeballing inches. Because of the problems detailed later on, I would recommend using a smaller measure and making twice as many cakes, half as big. Anyway, whatever the size, stick them in the fridge at least 15 minutes. I would do an hour or two, personally.

For my altered version of the ragu, I used four small-to-medium zucchinis (a little over a pound before I chopped the ends off). I cut them into chunks by first slicing thickly and then cutting each slice into four. Throw that into your biggest pan, and add a small chopped onion, a couple of finely chopped garlic cloves, 1/2 t dried oregano, 1/4 t salt, 1/4 t pepper, and 3 T olive oil. Cook over medium heat, covered, stirring occasionally, five minutes or until soft. Since I hadn't heated the burner in advance, I counted the five minutes when I started hearing sizzling.

In the meantime, half a cup of grape or cherry tomatoes and chop up the roasted pepper. When five minutes is up, add them to the pan with 3/4 cup water. A note - you could do less water and not have the additional cooking time I ended up with to cook the liquid off, but I think it turned out fine and I wasn't in a hurry. Cook ten more minutes, covered, stirring occasionally. According to the recipe, it's supposed to be thick now, and that may have something to do with the eggplant. With zucchini, it looked lovely but there was a ton of water, so I just let it simmer another ten minutes until most of the liquid had cooked off.

Now you can transfer your ragu to a bowl and wash the same pan for cooking the quinoa cakes. Put the heat on medium again and add 2 T olive oil to the pan. Wait until it "shimmers," whatever that means (I just waited until it felt hot) and then take your cakes out of the fridge. Carefully use a spatula to get them into the pan. Mine definitely were not happy with me, though they basically stayed together. You can flip after 4-5 minutes, and this was the problematic part. Sure, they were nice and golden brown, but they fell apart rather spectacularly when flipped, and it isn't like a pancake when you can just push the sides back in. My suggestion would be to either make smaller cakes (see above) or just dump the quinoa all in the pan and toss it around a little.

Anyway, to assemble, throw your cakes (or pile of quinoa) on plates and then throw the ragu back in the pan. Bring to a simmer and add 1/2 cup diced smoked provolone (recipe says mozzarella but provolone is cheaper, the "smoked" part is what's important) and about a tablespoon chopped flat leaf parsley. Cook thirty seconds and then dump over the cakes. Sprinkle with another 1/2 cup cheese. Eat.

Rita, my friend who also sampled my pumpkin flan for the October Blog Party, approved highly. However, we both thought it was far too much for two people (granted, I think it's intended for four). One cake and a fourth of the ragu makes a nice, filling meal. Also, it's delicious and has plenty of protein and vitamins. Whee!

Spiked Caramel Apple Cider

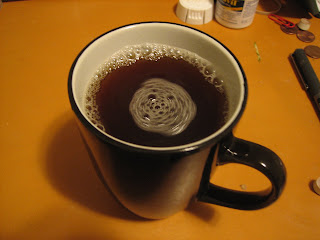
I admit that I tend to cop out a bit when it comes to Blog Party drinks. One of these days I'm going to make another impressive martini like I did with my first Blog Party, but I really don't drink much these days. In honour of the ridiculous cold lately, I decided to do something with one of the many flavoured cider packets I have lying around. This was a packet of Mott's caramel apple cider, paired with (classy) Jack Daniels and of course, hot water. The blur in the middle of the photo is on account of the fact that I had just finished stirring when I took it. Despite the lack of effort involved, this really was a tasty drink, warm and sweet to cut the whisky.

18 February 2008

Reminder

Don't forget! AVF round two entries are due this Friday night! I can't post to Is My Blog Burning, which is sad, but I know I have some readers lurking around from Foodbuzz and elsewhere whose dishes I'd love to see. So post about a vegetarian soup, stew, hotpot, chili, or something of the like, and comment or e-mail me with the link.

(Oh, and by the way - I've been eating on the cheap this week, but expect posts soon! I'll be cooking a little something for Blog Party at the end of the week, and hopefully *another* little something for Blog Party middle of next week, because I was inspired by this month's Gourmet, and then a ton of somethings for my tea party in a couple of weeks. So more recipes coming up!)

11 February 2008

Deep Fried

I wanted to participate in this month's doughnut event since I saw it on Peabody's blog, but I had a little trepidation. I love the taste of deep fried food but I hate the cleanup. Still, I decided to bite the bullet and attempt it, and the result was pretty tasty, though my cleanup fears were not unfounded. There are a few doughnut recipes I'd been curious to try, but I ended up going with this recipe for Kala Jamun, which substitutes pancake mix (!!) for the traditional Indian ingredients.

I mixed the dough with my fingers, and had a lot of trouble because my hands kept getting sticky, even with flour, so it maybe wasn't quite as even as it could be. Even so, I managed to roll it into neat little balls with just some leftover that wouldn't quite incorporate. I tried the first batch and then realised wow, these things expand! Pretty soon I had a pan full of uniform floating dough. That wouldn't do, so I dumped it and tore all my remaining balls in half.

That worked pretty well, though they do cook rather slowly. My main difficulty was in getting them to turn over, which really needs to happen halfway through or part will stick out of the oil and not get brown. I assume that if my balls were more uniform, this would be easier, but as it was I had a lot of trouble. It took about eight minutes a batch, and after I cooked half I gave up and threw out the other half of the dough.

The syrup was also a little troublesome - next time I would use a much shallower bowl so I could simply roll the doughnuts in the syrup and encourage them to absorb it. I will note that those closer to golden than to brown absorbed a lot more syrup and had a great fluffy consistency inside. Perfect served warm with a tasty cup of Oregon brand chai lattee, as seen here. If I do this again, I'll be cooking them only until just golden brown. Still, even with my difficulties they were tasty, and if I ever live in a flat with a dishwasher, I'll probably try it again.

08 February 2008

Baking for Peace

I just love it when I'm looking at one of my favourite foodblogs and I realise that I have all the ingredients to make a really tasty-looking recipe. As soon as I saw the recipe for these World Peace Cookies on Peabody's blog, I knew I had to try them out as soon as I ran out of mooless pie. I have no idea what they have to do with world peace, but when one of my classmates said he was bringing in baklava for his birthday on Wednesday and wanted to know if anyone could provide some sort of vegan treat for the lactose intolerant people in our Turkish class, I jumped at the chance to try them out.

Unfortunately, the weather was less than perfect on Wednesday. As you can see from this photo, the snow started falling Tuesday afternoon while I was making the dough and didn't stop until the next night. By Wednesday morning it had reached obnoxious blizzard status, and the University of Iowa even cancelled classes for only the third time in about ten years (but the second time this academic year). For that reason, the cookies never actually made it to my class, but I did trudge through the snow to a meeting at the clinic where I work, and the women there pronounced them "mmm!"

I pretty much followed Peabody's recipe, though there were some challenges. The first issue I had was entirely my own fault - I had recently purchased a new bag of brown sugar and a new bag of powdered sugar for when the current supplies run out, but my cabinets are very overstuffed and so they had been sitting on top of two of the rubbermaid containers I use to house my baking supplies. So that I could get to said baking supplies, I balanced them on top of the soups on the top shelf of the spices and canned goods cabinet, which is directly over the rubbermaid containers and also the bit of counterspace where I put my bowl when I'm using the electric mixer.

Well, you may be able to guess what happens next. I sifted the flour into the bowl, and all was well. Then I opened said cabinet again to get the cocoa power out, left it open, and a minute later the brown sugar kamikaze-d from the top shelf into the bowl, knocking some of the already sifted cocoa powder out, upsetting the sifter, and getting cocoa powder all over my floor, counter, the brown sugar bag, my tea strainer, and a can of oats. Oops. Anyway, I persevered and went on to the next stage, which went off without much of a hitch. Peabody's towel-over-the-mixer technique worked well for the dry ingredients. I may have mixed a little more than preferable, but I hate chunks of flour in my cookies. I stopped as soon as everything was a uniform dark brown colour, and the consistency was fairly pasty.

The dough was fairly soft, and though it wasn't too difficult to get it into the above logs, I did have to be very careful wrapping them in plastic. It might have been helpful even just to gather the dough, wrap it, and chill about fifteen minutes before shaping into logs, but I managed. After four hours of chilling, they were nice and firm. Indeed the cookies did tend to want to fall apart a bit as I chopped, but I pushed them back together with a fair amount of success. Though I didn't end up with the perfect circles Peabody managed, I think they turned out pretty nice. Note the shavings of peanut butter chip, and keep in mind that if you are chopping through chilled peanut butter chips you do need a nice sharp knife. Treat the log as you would an onion, holding it together as you go.

The best part about vegan baking, as I always say, is that you can eat the dough. And so I did. See, mom? No salmonella! Note that instead of butter, I used Country Crock. I don't know if vegans consider this vegan, but it's all vegetable oil-based. If not, you could always use Earth Balance. For the baking, I went strictly with the twelve minute time. They spread out a little, and as you can see the tops crack a bit. They won't look very done, and the peanut butter chips will be all melty. Resist the urge! Wait until they are just warm, as suggested, to eat.

The verdict? Oh, yum! I don't drink milk, but there's just something about milk and freshly baked cookies that is absolute perfection. When warm, there's just a thin crispy layer and the inside is almost cake-like. When fully cool, the cookies are uniformly soft and nice and moist, but they don't crumble too badly, which is nice. The taste is very strongly peanut butter, with just the hint of chocolate, but I love it. It makes me think of these pints of chocolate-peanut butter ice cream my roommate Kat and I used to buy, impatiently stabbing at the frozen peanut butter core with the tips of our plastic spoons as we waited for it to thaw.

06 February 2008

Winter Friendship Soup

So my friend Cass told me about this awesome soup recipe, which I knew I had to try as it's like Daddy's beanstroni but with spinach and cheese, which makes everything better, and made up almost entirely of things that were already in my pantry. When I picked the theme for AVF #2, I immediately thought of the recipe, and it turns out this also goes along nicely with another blogging event, No Croutons Required, co-sponsored by vegetarian foodbloggers Holler of Tinned Tomatoes and Lisa of Lisa's Kitchen. I hope they'll forgive me for double-submitting a recipe to take advantage of their soup theme!

The key to this soup is advanced preparation. It's really easy if you have everything ready to go before you start, and then you can just sit back and relax while it simmers away. I started by putting my water on to boil for the pasta, then I dumped my two cans of garbanzo beans and a can of dark red kidney beans into the strainer, rinsed them, and made sure they were fully drained. The recipe calls for a small handful of chopped basil, which is good because once I tore away the brown bits from my basil, which admittedly I should have used sooner, it really only was a small handful!

Once that was ready to go, the water was boiling, so it was time for pasta. The recipe says to use ditalini, but I think rigatoni or penne would work, and I went with mostaccoli since I happened to have some on hand. You want a cup cooked, and make sure it's cooked only to al dente (the recipe was "hard" al dente, but I was afraid of crunchy pasta and mine turned out great). Heat a tablespoon of olive oil (infused if you have it, I just used extra virgin) over medium-ish heat in your soup pot. Toss in your drained beans, a bay leaf, the basil, salt and pepper to taste, and a dash of cayenne. Cook briefly (I just went with the time it took to open my can of tomatoes and get the broth in position to go). Add a can of diced tomatoes (I drained slightly but I wouldn't next time), two cans veggie broth, and two cans water. Bring to a boil. For me, this took a while, and I had to cover the pot and crank up the heat.

By now, your pasta's probably cooked. I just dumped it in the same strainer I had used for the beans and gave it a good shake to get the water out. You want to simmer the soup for twenty minutes once it hits the boiling point, so you can walk away. I put the heat all the way back down to medium and it stayed simmering nicely with the lid off. I thought the soup would be too watery/liquidy, but some of it boils off, and really it could use more liquid for the amount of solid stuff involved. You want to be careful when serving not to put too much liquid in each bowl or you'll run out!

When 20 minutes were almost up, I fished the bay leaf out of the pot and then threw a bag of fresh (organic) baby spinach on top of the pasta in the strainer, picking out the bad leaves, and gave it a good rinse. Once everything was nice and drained, I tossed pasta and spinach in with the soup and added 3/4 cup grated Parmesan. Okay, maybe it was more like a cup. It does kind of like to clump together, so don't stir too vigourously or it'll all cling to the spoon. Cook until the spinach is just wilted but still retains a nice bold colour, which is a minute or two. Serve with a little more grated parm on top. Mm!

--

Don't forget, the deadline for AVF is coming up in a couple of weeks! Get those posts of vegetarian soups, stews, chilis, hot pots, etc up by February 22nd and let me know where they are to be included in the round-up.

04 February 2008

Earning My Nouveau Hippie Credentials

Okay, maybe not really. Though the whole "hippie" idea has had resonance for a while - I like flowing dresses, sunshine, peace, love, vegetarianism and being good to the environment - I don't think I really qualify. I don't smoke pot, for one, and I'm, you know, in law school. I've only been to California once. But my mom was a "junior hippie" (this means she is not old, just to clarify) and I kind of grew up with the peace and love thing. Also, granola.

Which brings me to my point. Homemade granola! I'm always really bummed at the prices of granola at New Pi. Their selection is awesome, but it also is kind of hit and miss. I got some ginger flavoured granola once that cost $3.50 a pound and was stale. And if you think about it, the actual ingredients in granola are not that expensive, really. So when I ran out of cereal this weekend, I decided to make my own!

The granola experiment was essentially a success, though I do want to tinker some more. I liked how crunchy my granola was. It didn't cluster quite as much as I'd want for a snack granola, but it works well for cereal. I would like it sweeter. I didn't want to pay for maple syrup, but next time I might either splurge or use some honey. I always forget that molasses has a very distinctive, slightly strange taste. As you can see from the picture, I was very psyched about using my new metal measuring cups. I like the pink plastic cups and blue spoons I have, but the numbers all wore off. These are really nifty - they look like bowls but they stand up! They also come on a little hook but I have nowhere to hang it. I'm considering getting some sort of a hook system at some point for my measuring cups, my cutting board, and my potholders, because that would be extremely helpful in my kitchen.

For the basic recipe, I used the suggestions here. I didn't have dark brown sugar so I used light, and I did 2 T light pancake syrup and 2 T molasses for the sweetener. Perhaps for that reason, my syrup didn't really want to simmer. I got some very small bubbles, but nothing more than that, and ended up giving up. Also, the oil and syrups stayed separated. I went with the cranberry-almond variation, since that's basically what I wanted anyway. I'm kind of like Amelie - I love the feel of oats between my fingers, so I did a lot of the mixing by hand (as you can see). I was afraid to "clump" too much because I wanted it spread out in the pan to bake evenly, but maybe next time I'll do more clumping. I baked the exact time suggested, and it came out a lovely brown colour. Note that it won't be crunchy until it cools. It makes a quart, which is perfect for my square Tupperware!

03 February 2008

Your Neighborhood Falafel Joint

I don't normally post restaurant reviews when I'm home, because let's face it, very few of my readers will ever be eating a meal in Iowa City. But the other day I went to Oasis for the third time, and I just have to comment, because it's such an awesome idea, and I think more cities should have one. You get a pita, as pictured, either half or whole, and though there are about four meat options their falafel is great so I don't even care that I only have one choice. There are also a bunch of side options that are vegetarian, though, and a vegan plate that's a little more expensive. Anyway, with your falafel comes hummus, onions, baba ganoush, and feta cheese. They also have this nifty little condiments bar where you can get sauces, so as you can see I got little containers of mango curry and tahini, and I also got an order of "sweet chips," which are made from pita and fried with cinnamon and sugar and amazing. The perfect dinner on a cold night!

02 February 2008

True Love, Thy Name is Chocolate Pie

This year, my Valentine is not a woman, but rather, Alton Brown's Mooless Chocolate Pie. I am honestly okay with this.

I had my doubts about the pie, but I also had some soft silken tofu in my cupboard, and I never use soft tofu, and the recipe looked so easy. And, in fact, it was. The most recent pies I've made have all turned out too goopy, and it looked like the same was going to happen here, but it chilled into a surprisingly firm texture, and also surprisingly smooth. When I blended everything together, I could see little teeny bits of tofu, but they miraculously absorbed into the pie in the end. Next time, I think I'll just do a homemade Oreo crust, because the storebought ones are always so dry, but it's still superb and I love the combination of Kaluha and chocolate.

So, the basic idea is this. You want to melt twelve ounces of chocolate chips. He says "high quality," and of course high quality probably would be better, but to keep it in budget I went with Hershey's semisweet. Add 1/3 cup of Kaluha, and careful to keep stirring so you don't burn anything. I recommend low heat. Once you have a nice smooth substance, you can take it off the heat and dump it in your bowl. Alton says to use a blender or food processor, but I found that a bowl and electric mixer worked fine for my purposes. Granted, my mixer is really, really powerful. Anyway, add a box of soft silken tofu. I drained it a little, but not completely. Also dump in a tablespoon of honey and a teaspoon of vanilla. I eyeballed it. Put your blender on liquify or your mixer on high speed until you have a really smooth consistency. I did it about three minutes on the highest mixer speed. Pour into a chocolate cookie crust and chill at least two hours. It should be almost a cheesecake consistency, and oh so delicious.

01 February 2008

Scrambled... Not-Eggs

My good friend Kat has been telling me for the longest time that I have to try this recipe for tofu scramble, and as tofu was on sale at the grocery store last weekend, I decided I had to bite the bullet and attempt it. I will admit that the spice blend is pretty fantastic. It has an Indian curry sort of flavour, but it isn't at all spicy. Next time I might try fresh thyme instead of dried, because the little bits get stuck in my teeth and I don't have a mortar and pestle to properly crush it, but I still consider the blend a success. As you can see, I just dumped everything onto a paper plate and swirled with my fingers, which worked nicely.

Like any pan-fried recipe, you want to be sure to have everything ready well in advance of the part involving heat. With that in mind, I went ahead and drained my tofu, squeezing a good bit of the water out, peeled my garlic cloves, got my spice blend all ready to go, washed my mushrooms and piled them on another plate, and peeled my onion (always last because I tend to cry). After I chopped up the onion (I used a medium sweet yellow onion from Peru because they were on sale as well) and threw it in the pan with my oil, I realised I really needed to use my largest pan. So there was a quick transfer and just a bit more oil before the mushrooms went in. I wish I could better capture the beautiful colour of the mushrooms - unfortunately, the one bad thing about this kitchen is that the stove is really badly lit for photographs.

One note about the recipe is that I cooked everything over medium heat because the onions started frying much too quickly at first. Also, my tofu was already pretty moist, so I only added a small splash of water towards the end. I didn't have trouble with anything sticking because I used a non-stick pan, but I did poke the tofu every now and again to make sure it was holding up in moisture. Towards the end, it started to brown, which is lovely. I've always found that tofu is much better when it has that grilled taste. You really don't need to break it up too much at first, because it will crumble more in the pan when you move it around. Also, I couldn't find nutritional yeast, so I used Parmesan cheese and killed the vegan aspect. That said, you could easily use neither and it would be just fine.

---

On a little self-promotional note, the Featured Publishers at Foodbuzz are having a little friendly competition this month. What does this mean? Well, if you're a regular reader, thank you, and I encourage you to keep coming back. I'll be posting several times a week whenever possible, and providing you with as many new photos and recipes as I can get my hands on. Also, I'd be very appreciative if you could spread the word about my blog to your friends. It may be small, but it's still growing! Finally, I hope that the AVF challenges will be a way to attract more readers, so I encourage anyone who is interested to participate! I'd love to have you. Also, if you did find your way here from Foodbuzz, it's great to have you dropping by, and I hope you'll come back soon.