05 December 2010

A Birthday Banana

Recently, my mom celebrated her birthday and I went home to North Carolina to see my parents for the occasion. For dinner, we had Smitten Kitchen's mushrooms bourguignon, which I've blogged about previously (always choose a familiar recipe to cook after a five hour drive) but I tried something new for dessert. Daddy doesn't really like super sweet things, and I knew I wouldn't have time to bake, so I decided to go in a fruitward direction. The choice was Alton Brown's recipe for bananas foster. Alton's usually a pretty sure shot, though sometimes I can be underwhelmed by his recipes.


Sadly, this was one of those times. It wasn't bad, per se--you got the banana and the liqueur flavored rum sauce surrounding it--but the instructions didn't really yield a nice bubbly caramelized banana like I was picturing, and getting the thing to catch on fire was a hell of a task. Don't expect that his "get the pan really hot" trick will work. You do need flame. We got the sauce to light, but only for about 15 seconds, so it didn't really do its job. Hence the sad cold banana sitting in sauce photograph. Oh well. At least we tried!

25 November 2010

Blogs to Be Thankful for, 2010 Edition

Every year since I started this blog in 2007, I've done a little Thanksgiving special shout out to my favorite foodblogs. This year is no exception, but a lot has changed. Unlike last year, when I was more or less unemployed and managed to actually *cook* something from 20+ blogs in time for Thanksgiving, I'm now working 9 hours a day and commuting 4 hours a day and therefore rarely manage to cook at all, let alone blog. I've had to cut back my food blogs a lot, which is quite a bummer for a compulsive recipe collector. So this year, instead of saying something about each of a few favorite blogs, I'm going to tell you all the blogs I still read, grouped by category, so that maybe you can discover something new!

Baking and Desserts

Beau à la Louche
Chocolat et Caetera
Joy the Baker
Bake or Break
Brown Eyed Baker
Culinary Concoctions by Peabody
Foodbeam
La Cuisine d'Helene
Sugar Plum
Tartelette

Simple, Reliable Recipes

Cafe Fernando
Coconut & Lime
Delicious Days
Kitchen Wench
La Tartine Gourmande
Smitten Kitchen
The Passionate Cook
Use Real Butter
Evil Shenanigans
David Lebovitz
Ezra Pound Cake
Greedy Gourmand
Hey That Tastes Good
Inn Cuisine
My Madison Bistro
Picky Cook
Simply Recipes
Tracey's Culinary Adventures
101 Cookbooks

Regional

Almost Turkish Recipes
Binnur's Turkish Cookbook
Ev Cini
Homesick Texan
Nami Nami
Pham Fatale
Russian Season

08 November 2010

Self Consolation with Peanut Butter Fudge and Butterscotch Brownies

Confession: I've been a little bit down about food blogging since I got kicked out of Project Food Blog in round one. I didn't think I'd go much further, but since I had about a 2 in 3 chance of advancing, and since the whole basis of that first round was the blogger's personality, it feels a little like a rejection of me. So I've been licking my wounds and eating a lot of prepared food in the meantime.

Of course, one thing that's always been a tried and true mood lifter is sugar. Specifically, in this case, brown sugar. Brown sugar in square form. Really, any square dessert will make me happy. The first thing I tried in this vein was a good getting-back-on-the-horse recipe, in that it involves a microwave and comes from Alton Brown, one of my most trusted recipe-creators. It was very tasty, though the method kind of backfired. 1/3 of the butter mixture ended up all over the inside of my microwave and my floor. I recommend that you be very careful with the last two minutes, and try stirring again at minute 3 if your microwave is powerful. I omitted the vanilla and it was still very good.

The second recipe, for butterscotch "brownies," is of more dubious provenance. I attributed it in my recipe database to "Joy of Cooking," but the recipe for butterscotch brownies in my copy of Joy of Cooking is definitely more complicated than this one. I'm guessing it's either from my dad's copy or off the internet somewhere. Anyway, it's pretty simple--you melt 3 tbsp butter, combine it with a cup of brown sugar until wet, let cool a bit, then add 1/2 cup flour, 1 tsp baking soda, 1/2 tsp salt, 1 tsp vanilla, and an egg (I used 3 Tbsp applesauce). I also dumped in about 1/2 cup cinnamon chips. Bake at 350 for 15-20 minutes in a greased 8 x 8 pan. As you can see, mine turned out very thin and bubbly. Next time I would double the recipe, because I liked the gooey effect but I would prefer a bit more weight to my "brownies." Loved the butterscotch flavor.

22 September 2010

Reminder: Time to Vote!

Just a quick reminder that voting is in full swing for Project Food Blog. You can vote on the left-hand side of the the screen, and on Friday 400 bloggers will be selected to move on to round two. Thanks for voting!

18 September 2010

Project Food Blog #1: Ready, Set, Blog!

So, mesdames et messieurs, here we are. Week One of the long-anticipated Project Food Blog contest. The judges have asked us, for this round, to talk about what defines us as a foodblogger. In other words, who the heck am I? Some of you have been around since this blog's humble beginnings in 2007, when I eagerly moved into my first all-alone apartment as a first year law student in Iowa City. You witnessed my excitement at having an opportunity to do my shopping, pick my meals, and create them without any rules in place. The kitchen was, in those years, a refuge for me. It was a place outside of the strict environment of school, where I could make beautiful, sensuous desserts and messy, spectacular failures without anyone but you, the sympathetic online audience, to judge me.


Others of you are new, here by way of Foodbuzz, and so I believe a proper introduction is in place. My name is Judith. I am 25 years old, and I live in Baltimore, Maryland. I have a busy, hectic life as an administrative assistant for a small non-profit in Washington, DC. Every day I spend about 13 hours working and commuting by train to and from work, so my blog is in a state of transition right now as I learn how to cook in a constantly stressed, barely-there-budget environment. In a way, this contest is a great time for a blog rebirth. I'm not here to impress you with flashy photography (can't afford the camera!) or a gorgeous layout (can't afford Photoshop!) But what I do offer is a blog that comes from the heart. Food and writing are my passions. The other day I admitted to a friend "you know what? I don't think I actually like to cook that much. I like to eat." So this is my space to express a means to an end, and to give other stressed out, overworked and underpaid young people an idea of how to EAT well.

I bring a number of influences to the kitchen. First, I'm a Southerner. Second, I'm a vegetarian. That's right, folks, it's not an oxymoron. I grew up in North Carolina, and spent many years of my childhood and adolescence not eating meat. I went back to vegetarian at age 20, and this Thanksgiving will be the five year mark. I'm also something of a Europhile. I speak French, German, and some Russian and Turkish. I love playing with different cuisines, but northern French cream and butter is where my heart is. When you read my travel diaries, you might wonder what else I did in Europe, other than eat! Those laborious descriptions of every pastry, every cheese plate, were the seeds that ended up blossoming into this blog. It's been a challenge incorporating lactose-intolerance into my cooking, but I'm slowly learning how to be creative in a kitchen where cheese has always been my secret ingredient.

So what you can expect in this contest, and in this blog as a whole, is a mélange of food, creativity, and challenges coming together. I love to try to make downhome Southern food vegetarian. I love mixing different cuisines. And I love coming up with new ways to address the challenges of dietary restrictions and a limited time and budget. These days, I'm switching over from a mentality of scarcity to one of abundance. I may not make a lot of money in most people's terms, but gosh darnit, I know how to stretch it! I hope you enjoy this journey with me, and of course, remember to vote using the widget on the left hand side of your screen. Voting for this round starts September 20th!

17 September 2010

Trader Joe's Quick Breakfast Fix

That raggedy old camera is on me again, but I'm going to go ahead and post this and append the image later because the brilliance of Trader Joe's never fails to astonish me. I love the soy chorizo they sell, which is cheap and very meat-like, but it's really spicy. I mean really spicy. So here's my solution, an original recipe using all Trader Joe's products (and no, I didn't get any compensation for this, I just really like their food):

Vegetarian Breakfast Mash

1 tube Trader Joe's soy chorizo
1/2 jar Trader Joe's eggplant and garlic spread
1 tube Trader Joe's polenta

Mix all the ingredients together well. Microwave until hot. If you want it even less spicy, try adding some frozen corn with butter sauce.

03 August 2010

Fresh Strawberry Ice Cream

Well like I said in my last post, I had a few queued up, and then I lost the queued post! So I'm going back a bit in the recipe annals, which is probably good since I recently discovered my lactose intolerance and haven't been cooking as much while I adjust. The recipe for this strawberry ice cream is just the one in the Cuisinart ice cream maker manual. I made it with really great fresh strawberries from the farmer's market, and I think what really makes the taste is that you use lemon juice. I upped the portion of milk to cream and it was still thick and delicious, which proves that with fruit ice cream, it really is mostly just the quality of the fruit!

05 July 2010

From the Pantry: Granola Bars

First, apologies for the posting gap! I've been transitioning to a new job and thus a little bit absent, but I'm back now and have a few posts written in advance.

Now, granola bars. I wanted to do a little experiment to see whether I could save money by making my own granola bars as a portable snack during the week. I can't really afford to buy boxed granola bars regularly, and I went to Smitten Kitchen for the recipe that Deb highly recommended. These were very tasty, but more like a dessert bar than anything. I think the problem was that I picked mix ins like butterscotch chips, chocolate chips, and coconut instead of dried fruits or nuts. I did use the optional peanut butter, and I included peanuts as well. I might try this recipe again, but I'd use unsweetened fruit and nuts to try to make the bars firmer and less sweet.

30 May 2010

New Blog Tags

Hello, readers!

While I'm waiting for my camera batteries to charge and gearing up for an evening of cooking the bounty I picked up at the farmer's market this morning, I wanted to introduce a few new tags I'll be using on the blog. I normally tag by ingredient, as well as a few other things like special blog features, and you can see all the tags on the left-hand side of your screen. I'll be cleaning the ingredient tags up a bit, but I also will be adding a few things to make the navigation more practical. These are the new tags and what they mean:

make again: recipes that I would make again, not necessarily all my favorites (those are starred in the recipe index), but the ones that I both liked and consider worth the effort required to put in regular rotation

make ahead: recipes that require advanced preparation, usually at least half a day

quick recipes: something you can put together in 15-20 minutes or less total

quick prep: might take a while, but the active cooking time is low; good recipes for folks with low energy or spoons

from the pantry: this is an existing tag, but I wanted to draw your attention to it because this is the tag where budget recipes live

26 May 2010

How to Cook Everything Vegetarian Month One: Tomato Bulgur Pilaf with Cinnamon

I've been hesitant to start this feature while my camera battery charger is missing, but I'm hoping that doing a post without a photo will magically cause it to appear. The feature I'm referring to is something that was loosely inspired by the Julie/Julia project, a project which I admittedly had no great love for when it was happening but was inspired by nonetheless. I wanted to do something like that with a cookbook, though I didn't really want to cook an entire book, and I didn't want to cook only from that book for a year. Instead, I decided to do a monthly cooking project, and what better book for this vegetarian blog than Mark Bittman's How to Cook Everything Vegetarian?

I've broken the book down into 158 sections. I went mostly with the same level of section headers, though in some cases where a header at that level had an awful lot of content, I used the sub-headers. I left out a few of the vegetable headers that either didn't have a recipe at all or had one recipe and would be almost impossible to find in Baltimore. The goal is to expand my repertoire of simple, standard dishes, not to go wild and crazy. I'll be cooking from at least one section a month, which means that this would take thirteen years to complete if I didn't do any extras, but I will probably do extras. I won't be posting the recipes for copyright reasons, but I will include page numbers, and you can find them all in the hardcover edition of How to Cook Everything Vegetarian, available wherever books are sold.

So, month one. I started with an old favorite, bulgur. The Bulgur section is just a few recipes, but I had to go for it first because I've been eating bulgur a lot, and frankly, it's a little tired. I picked out the Tomato Bulgur Pilaf with Cinnamon on page 556, which is actually a variation on Bulgur Pilaf with Vermicelli. One of my favorite things about this book is that it's full of variations, lists, and charts to expand the main recipes. I thought the way the variation was written out could use some work, because it told you what to add but not when or how to add it. Still, I did all right. I didn't use tomato paste or garlic, and I used water instead of stock. It turned out nice and spicy and flavorful. I did think the cinnamon made the flavor quite complex, but I would dial down the red pepper flake next time because the spice overwhelmed the rest of the flavors somewhat.

10 May 2010

Product Review: Cuisinart Pure Indulgence Ice Cream Maker

I recently received a Cuisinart Pure Indulgence 2 QT Ice Cream Maker to review from Cookware.com. Cuisinart advertises this machine as being able to make two quarts of ice cream, sorbet, or frozen yogurt, so I decided to give it a whirl on the frozen yogurt. I used a recipe for vanilla frozen yogurt from the manual that came with the machine, and I was impressed with how well it did the job. You'll notice from the picture that what you come up with is a lot of creamy frozen yogurt with some frozen shavings dumped on top. This is because the bowl freezes the ice cream through a coolant that is housed within the walls of the bowl. Thus, the metal walls are much colder than the middle. I recommend having your plastic or rubber spatula ready to go as soon as you stop the machine, because the quicker you scrape, the less you get those frozen shavings. That said, they mixed in well, and once I froze the yogurt for a couple of hours, it was a homogenous substance.

The benefits of this ice cream maker are its size and its ease of use. It's very simple and it does what it's supposed to. The 2 quart size is great because you can make enough for a party if you need to. You do have to store the bowl in the freezer, which means you need room for it, but you can use the base on your counter and it only takes 20-30 minutes to make dessert. The frozen yogurt I made was smooth and creamy, though I thought the recipe in the manual was a little bit too sweet. It also doesn't freeze well for the long term; if you're the only one eating you probably want to make ice cream instead. You can get your own ice cream maker at Cookware.com. I also noticed when I was browsing the site that they have a ton of decently priced bakeware, so you might want to check that out as well.

Disclaimer: Cookware.com provided an ice cream maker for review free of charge. Shortcut to Mushrooms reviews books and products as provided only when given complete freedom to write an honest review. No direction was provided in writing this post.

19 April 2010

Foodie Bookshelf: Barbecued Tempeh Spread

Just a head's up first about some changes around the blog. I have a bit of a recipe-collecting obsession, but I rarely actually *cook* from the recipes I collect! I'm trying to remedy this by paring down my google reader from 150 blogs to 75 to give me more time to cook and to blog. I'm going to try to blog twice a week and to cook more from blogs and cookbooks that I've been meaning to try. I also left Tuesdays with Dorie, in hopes that I'll have more time to do desserts from different sources now.

So we're back into spring/summer recipes, and I'm going back through stuff I cooked last year that I never got around to blogging. I can't believe I missed this one, because it's one of my favorite recipes! This is barbecue tempeh spread, and it comes from an unassuming little book called Simple Vegetarian Pleasures. The book isn't illustrated, but it's chock full of tasty vegetarian recipes, most of which are actually quite easy.

This was my one of my first attempts at cooking with tempeh, and I found that I love the stuff. At my co-op in Iowa City, it wasn't much more expensive than tofu, but the texture is to me much more palatable. As you can see here, when you chop it up and combine it with other ingredients it's not unlike meat, and the barbecue spread is rich and flavorful. It may not taste exactly like barbecue, but it's an entirely pleasant substitute for sandwiches.

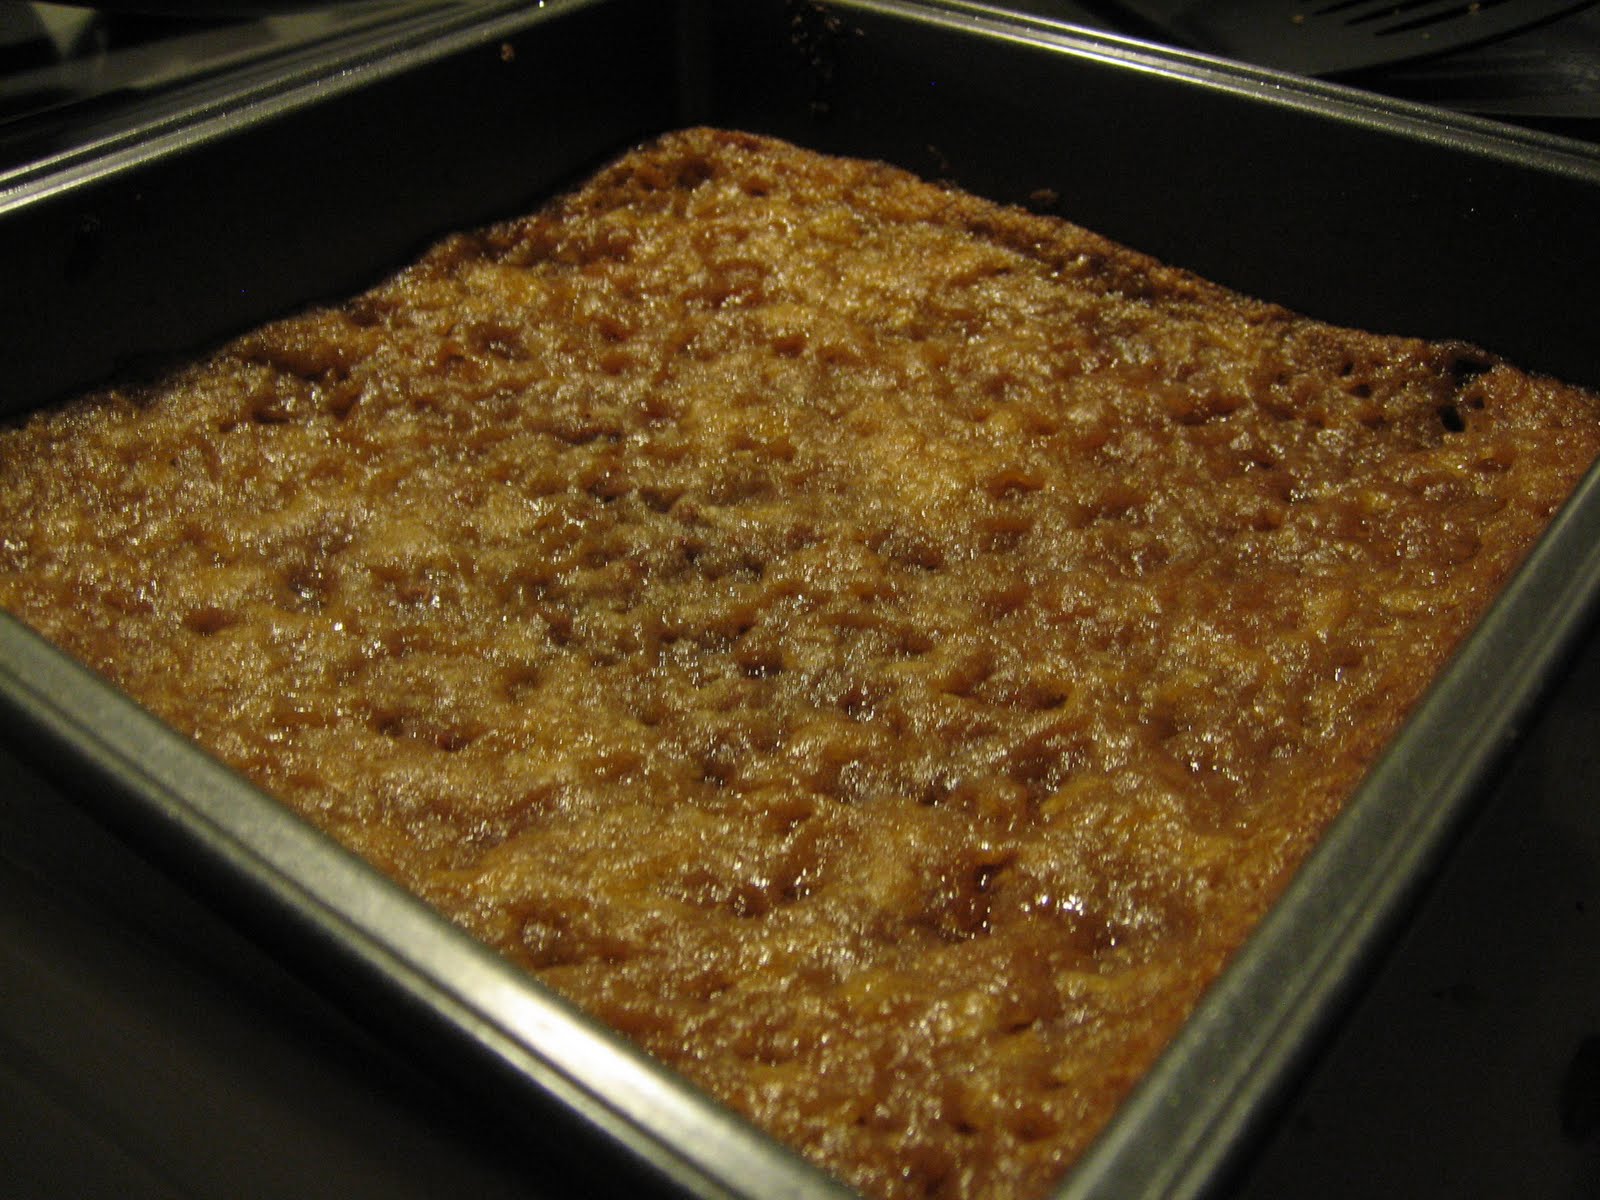
I also tried a dessert recipe called "Wacky Cake." Apparently this is a fairly well-known retro cake, but I'd never tried it. I had run out of vanilla, so I actually replaced the vanilla in the recipe with anise extract for a licorice-flavored Wacky Cake, and it was a pretty good substitution! The glaze is sweet and sticky, and I liked pouring it on the cake in the pan because that's a much less messy way to do it. It's best the first day, but stays fairly moist.

Barbecued Tempeh Spread
Simple Vegetarian Pleasures

1 tbsp vegetable oil
1-1/2 tsp chili powder
8 oz. tempeh, finely chopped
1 celery rib, finely diced
1/4 cup minced red onion
1/4 cup mayonnaise
2 tbsp ketchup
1/2 tsp red wine vinegar
1 tsp dijon mustard
1 tsp molasses
1 small garlic clove, minced or pressed
salt and pepper

Heat the oil in a medium, non-stick skillet over medium. Stir in chili powder and cook ten seconds, then stir in tempeh and toss to coat. Cook, tossing frequently, about seven minutes or until golden. Scrape into a bowl and let cool. Stir in celery and onion. In a small bowl, combine all remaining ingredients. Pour over tempeh and toss well. Cover and chill a half hour to three days.


Wacky Cake
Simple Vegetarian Pleasures

1-1/4 cups flour
1 cup sugar
1/3 cup unsweetened cocoa powder
1 tsp baking soda
1/2 tsp salt
1 cup warm water
1/3 cup vegetable oil
1 tsp vanilla
1 tsp distilled white or apple cider vinegar

Chocolate Glaze:
1/2 cup sugar
4 tbsp butter
2 tbsp milk
2 tbsp unsweetened cocoa powder
2 tsp vanilla

Preheat to 350, 325 if using Pyrex. A good ten minutes later, start cake. Place flour, sugar, cocoa, soda, and salt in an 8 x 8 cake pan. Stir with a fork until uniform in color. Pour on water, vanilla, oil, and vinegar and immediately stir with the fork until completely blended. Use rubber spatula to help get anything in the corners. Place in oven and bake 30 minutes or until knife comes out clean. Cool cake completely on wire rack, about two minutes. Don't unmold. For the glaze, combine sugar, butter, milk, and cocoa in small saucepan and bring to boil, stirring frequently. Reduce the heat to a lively simmer and stir constantly for two minutes. Remove from heat and stir five minutes or until cool. Add vanilla, then pour glaze on the cake. Let cool completely before serving, about an hour.

13 April 2010

TWD: Swedish Visiting Cake

I just started muttering "My Swedish Visiting Cake brings all the girls to the yard..." I may be beyond help. Anyway, this cake was the Tuesdays with Dorie pick for today, and I found it absolutely delicious! I made it during that cold weekend of baking, which was perfect. The cast iron really does allow for a crisp crust, and though I left it in the oven on the long side to let the middle get golden, the bottom was still just a medium brown. The cake had a lovely dense, moist crumb, and like the Coconut Tea Cake it was really good for breakfast.

08 April 2010

Quick Hit: Pomegranate Kir Royale

I hadn't decided whether to blog about this because I couldn't get a great photo with my phone, but it was a really tasty drink! It's the pomegranate kir royale at Bonefish Grille, something that you may only be able to get in the wintertime, but it's worth it. Bonefish is a chain restaurant, so grab some friends and plunk down on your nearest barstools to order a few as soon as you get the chance. Look for some more tasty reviews coming up soon!

02 April 2010

From the Pantry: Tater Tot Casserole

Last weekend, I cooked up a bit of a storm. After getting back from New York, I was on a simple food kick, mainly because of all the time I spent flipping through my aunt's collection of Real Simple magazine. I also wanted to do a last round of comfort food on a day where it was cold enough to run the oven, so I ended up with a number of items including this ultimate comfort food, tater tot casserole. I've been needing to eat more fruits and veggies, and this recipe has plenty: a box of frozen corn, a box of frozen peas, and a couple of onions. I also just happened to have a bag of tater tots in the freezer, so it used those in a way that balanced out fried with healthy. I modified the recipe from this one by Jael Baldwin. I actually did intend to include beans (black) but I completely forgot them! It didn't really matter, though.

Vegetarian Tater Tot Casserole

1 can cream of mushroom soup
1 bag frozen tater tots
1 can water
2 small yellow onions
1 small box frozen peas
1 small box frozen corn
onion powder
garlic powder

Stir together cream of mushroom soup and water in 13×9 pan. Add approximately 1/4-1/3 of the tater tots, and the frozen veggies. Roughly chop the onion and sprinkle over. Shake on some garlic and onion powder. Spread the remaining tots in a single layer on top. Bake in 375 oven for about 45-50 minutes. You should have crispy tater tots on top without them being burnt, and the mixture beneath should be happily bubbling.

01 April 2010

Eating Out: Baltimore, Raleigh, and New York

I've been a bit remiss in restaurant reviews lately, even though I don't actually go to that many restaurants. This first picture was taken at my birthday brunch, when my friend Rachelle took me out to my favorite restaurant in Baltimore, the Golden West Cafe. I almost always get the same thing, Huevos Montulenos, which are pictured more appetizingly below along with a few of the tater tots I really cannot go without. They come with chipotle mayo and ranch, which is enough to make me happy. The huevos are also really good, mostly because of the fried plantains. I can't get enough of those things.

I also went to a couple of very good restaurants a couple of weeks ago in New York, though the lighting wasn't really blog-worthy for photographing. We went to lunch at Blosom Cafe, a vegan place on the Upper West Side (I think it's Columbus and 82nd). The service was pretty terrible, though I blame it all on this one egotistical waiter and would be willing to try again. It's a bit pricey, but not terrible. I had a Southern Seitan sandwich, which could've done with less bread, but I'll forgive them because the sweet potato fries were amazing, as were the charred brussels sprouts I ordered as a side. We also had the carrot cake, which was yummy, and some very tasty tea.

For dinner after a screening of Alice and Wonderland, we went to the midtown Europa Cafe (there are multiple locations). It's a good place for a light meal, with a menu that includes quiches, crepes, and salads as well as some more substantial entrees. I had a very tasty salad with warm goat cheese on top, and the next day I tried my aunt's leftover spinach quiche, which was amazing. This last photo is actually from a holiday trip to Raleigh in December, and it's mostly there to prove a point. Vegetarians, order sides in chain restaurants! We went to the Bonefish Grille and my veggie sides and salad were just as tasty as my parents' pricier entrees.

30 March 2010

TWD: Coconut Tea Cake

I was actually surprised by the Coconut Tea Cake because from the description I expected a much more typically European cake. My cake was moist and fluffy with a lovely crackly golden crust and a sweet flavor. I used almond extract because I was out of vanilla and I also used Bacardi Limon instead of dark rum because it was what I had on hand, but both those substitutions worked fine. I'm looking forward to the other half in my freezer! As always, don't forget to visit the other TWD bakers.

10 March 2010

TWD: Thumbprints for Us Big Guys

I'm a bit late on this, because my camera batteries were all drained yesterday, but here's Tuesday's recipe. I thought these cookies were really tasty with that roast hazelnut flavor. I used key lime jelly instead of jam, so it was a bit thinner and as you can see some of it missed the cookies. I ended up just letting the bottoms absorb the jelly and it was quite tasty. Lime/hazelnut is an odd combination, but not a bad one. I would recommend that you really press all the way to the bottom when poking the holes; I got a lot of thick cookie and not as much space for jam. I also think this would be really good just dropping a couple of dark chocolate chips into the cookies right after they come out of the oven. See the rest of the TWD bakers' progress here.

26 February 2010

From the Pantry: Scalloped Potatoes

We've all heard about food porn, but this is cheese porn. Sadly, I've developed a sensitivity to cheese and can't eat it very much, but I did a variation on scalloped potatoes here that allows a little bit of cheese to go a long way and is also easy on the wallet. I found potatoes and onions on sale, which is easy to do in winter, and left the cheese out between the layers, instead focusing on that browned top. I also used the Essence that Foodbuzz sent me a while back to season the flour, giving it a spicy kick. Delicious!

Scalloped Potatoes

2 russet potatoes
6 small yellow onions
flour
salt
milk
margarine
Emeril's original "essence"
grated Italian cheese blend

Lightly grease a 13 x 9 Pyrex and preheat to 350. Wash the potatoes thoroughly and slice them and the onions relatively thin. Make an overlapping layer of potato slices. Salt the layer, then dust with flour and essence. Dot with margarine. Use all the onions for the next layer, then the rest of the potatoes. Do the same salt, dust, and dot routine. I forgot the margarine on that layer but it didn't really matter. Cover with foil and pop in the oven for 45 minutes or so, or until the potatoes are tender when pierced by a fork. Uncover and sprinkle with a light layer of cheese. Return to the oven for about 10-15 minutes or until the cheese is nicely browned. It'll be pretty wet, but that's okay. Serve warm.

23 February 2010

Eggnog Pancakes

So back in January, I had some buttermilk lying around to be used, and I'd been in the mood for pancakes. Joy the Baker's recipe for Eggnog Pancakes showed up on my feed reader, and I decided impulsively to try it. My impressions? I think her chai spice latte pancakes were better, but mileage may vary, because I don't have a spice grater and thus I was using pre ground nutmeg, which everyone knows is not nearly as good. The flavor of the alcohol did come out a lot, and I liked it. Good with maple syrup!

18 February 2010

From the Pantry: Hilary's Super-Easy Peanut Butter Cookies

My friend Hilary is the sort of cook I would like to be--someone who walks into a grocery store, sees ingredients, and has an idea of what to do with them. Also someone who sees something on a foodblog and goes to the store that very night to get the ingredients. This is her recipe, the world's easiest freaking cookies ever. Okay they're more just a way to eat peanut butter straight without it sticking to your mouth, but I have no problem with that. It's a great go-to when you want cookies but don't want to work for them. You can bake one at a time, and just grab some dough when you're in the mood.

Hilary's Super-Easy Peanut Butter Cookies

1 cup peanut butter
1 cup sugar
1 egg

Stir. Bake cookies in the toaster oven one or two at a time, about 350 for about ten minutes or until the bottoms are starting to brown. You can also do it longer and they will become more solid and cookie-like, but dark. Leave the dough in the fridge and use at will.

16 February 2010

TWD: Chocolate Chip Cookies

It's kind of sad to see how the other TWD bakers did this week, because everyone has these lovely, thin, crispy chocolate chip cookies, which is exactly what I love. On the other hand, I followed the recipe to the letter and I got these so-so cookies that were sort of chewy warm, but like rocks when they cooled. I dunked them in tea and they weren't a total loss, but I could've bought the same thing at the grocery store. Definitely sticking with my tried-and-true recipes (and maybe Jacques Torres' if I get around to it).

09 February 2010

TWD: Rick Katz's Brownies for Julia

My new. Favorite. Brownie. I don't care what the other TWD bakers say about it being too wet, too gooey, underbaked. I loooove me some melted chocolate. And this is one gooey, melty brownie. Warm, it looks like this, with a cakey bottom, fudgy middle with lots of melty bits, and thin, crispy top. Chilled, you get something very dense and fudgey, or you can bring it to room temp for something in between. I used a mix of white, brown, and golden sugar with the eggs because I ran out of white, and that worked just fine. I also used sea salt, which I highly recommend, and didn't reduce the amount because I like my sweet and salty. I used an 8" square pan, ungreased, and that was fine. Dorie warns that the brownies are very delicate, but I found that once cooled to room temp, they sliced very neatly and were easy to lift from the pan and wrap for freezing. The delicate part is the top, so just don't press on that and you'll be fine.

02 February 2010

Tasting Notes: Just Like Mama Used to Make

First, I just want everyone to have a moment of respect for that pan. Damn. Okay, anyway, on to the post... You may have noticed that my parents come up from time to time on this blog, and rightfully so. I wouldn't necessarily call either of my parents a "foodie," but they both know their way around the kitchen. For all I think of Daddy as the chef in the family, and use him as my go-to guy for a panicked grocery store phone call about what to substitute for this and that vegetable or for advice on how to save a potentially ruined dish, I've noticed that Mom comes up more often on here, and there's a reason for that. Mom knows how to do comfort food, and a lot of this blog has been about getting back to my roots, embracing what's Southern in me, and indulging in some good old fashioned cheesy comfort. You've seen several incarnations of mommy pasta so far, as well as Mom's standby gratins dish, but since it seems to be a pimento cheese week, it's time to unveil Mom's tried-and-true grilled cheese technique.

Grilled cheese shows up a lot on this blog, mainly because I cannot get enough. When I was home for a weekend in December, and Mom made me grilled pimento sandwiches for lunch both days, I was kind of in comfort food heaven. The funny thing is, I am physically incapable of reproducing her technique. I don't know what it is, but I can't do it. Nevertheless, I'll recount her instruction here, and maybe some of you are better bloggers than me and will be able to create the heavenly grilled cheese pictured. Absolutely key, Mom says, is getting your pan hot. Make sure it's very hot before any bread touches it--it's better to lower the heat mid-grill than to have to turn it up. Put some mayo on the inside of your sandwich, spread with pimento cheese (see my last post for a homemade recipe), and generously slather the outside of the bread with margarine. Now grill that sucker. Let it chill for a while before you check it. It's better a bit burnt than undercooked. Flip (carefully). Repeat. Eat that sucker. Yes, I know, it's kind of sad that I can't manage this. I blame my stove. But go on, friends! Go forth and be cheesy! Live long and pimento.

31 January 2010

My Southern Christmas Lunch

I didn't really celebrate Christmas last year, but I did humor the holiday by doing a little something for lunch. I had been craving yeast rolls, and I saw these dill sour cream rolls on Coconut & Lime so I decided to give them a shot along with some homemade pimento cheese. The cheese was awesome and easy; I combined a couple of different epicurious recipes and made it with extra sharp cheddar only (some call for white cheddar but that's harder to find). The rolls kind of failed, but I want to make it clear that that was entirely my fault, not Rachel's recipe, and I may try again with less fail-y yeast and a warmer environment. I knew they wouldn't rise in my 65 degree apartment, but tried anyway. I have to say though, despite the completely different consistency (very, very dense and not flaky or fluffy), the taste is pretty good. They worked well for a little pimento sandwich.

Pimento Cheese

8 oz extra sharp cheddar cheese, grated
4 oz pimentos, drained and mashed up into little pieces with a fork
2/3 cup mayonnaise
Black pepper and cayenne to taste

Mix together everything but the mayo, then add mayo and mash it all up real good with a fork. Let rest in the fridge a couple of hours. Enjoy.

26 January 2010

TWD: Cocoanana Bread

This week, the TWD bakers are making Cocoanana Bread. This bread is chocolate to the max, almost more like a cake. I loved the taste, with the melty bittersweet chocolate chunks and my good Trader Joe's cocoa powder. It was a little thick and hard to work with with the hand mixer, but my little mixer persevered well. It was a little dry, and I think next time I'd do the optional melted chocolate in the batter to see whether that helps. The top is wonderfully moist and cakey, though. A hint for any banana breads: if you freeze your bananas once they get brown, you can stick 'em in the microwave for a minute per banana and then you'll have a warm, pre-mashed banana ready to go. Just cut the peel open and let your banana glop out into the bowl.

22 January 2010

From the Pantry: A Slightly Shinier Beans and Rice

I must have been about five when I learned that beans and rice are the perfect protein complement. And when I'm trying to save money and get my nutrition in, they are definitely the way to go. This New Year's Eve, I ignored the black eyed peas wisdom and threw together this simple black beans and rice combination. One bag of boil-in-a-bag brown rice, one can of black beans, a healthy dollop of sour cream, a big shake of garlic powder, and a fair shake of paprika, and you've got this beans-and-rice medley. Sour cream makes everything worth eating.

16 January 2010

Devilled Eggs

 A while ago, I looked through a book of devilled egg recipes. Just devilled eggs. Sixty or seventy devilled recipes. Some were really weird. Some were intriguing (avocado?) Some were just plain snooty (caviar). The other day, I needed something to eat and I didn't feel like going shopping, so I boiled some eggs, and I decided to make them more fun by deviling. The recipe I was used was not really a recipe, it's just what I tend to do. The yolks of four eggs go with a big spoonful of mayo, a small spoonful of mustard (I used the Emeril's horseradish brand that Foodbuzz provided to me a while ago; very good combo), a bit of garlic powder, and of course paprika on top. You can't really go wrong.
Posted by Picasa

05 January 2010

TWD: Cocoa Buttermilk Birthday Cake

Happy birthday, Tuesdays with Dorie! This week there were two options to celebrate TWD's anniversary, and I chose Cocoa Buttermilk Birthday Cake. I had to buy malted milk powder online, so it was a bit of an ordeal, but fun nonetheless. My cake turned out a bit dry, probably because I didn't add the optional melted chocolate to the batter. It was the kind of cake that really is best on day one, served room temperature as suggested. The frosting is tasty, sweet, and smooth, so even if you're eating the cake throughout the week, you can do a trick where you microwave a slice for 30 seconds, softening the frosting to a melty consistency, and then combine the frosting and cake crumbs to balance moisture and sweetness. It didn't have an obvious malt flavor, but maybe that's just me. You can see how the other TWD bakers did here.